
What are the Most Common Suspension Issues in the BMW X6? (7+ Expert Tips)
 By
Vroomouk
By
Vroomouk
In this brief article we are going to discuss the different BMW X6 Air Suspension problems, what the causes are, and their troubleshooting Tips.
What are the most common air suspension issues in a BMW X6?
The most common BMW X6 suspension issues are:
- Front Lower Control arm Failure
- Front Shock Absorber Failure
- Rear Shock Absorber Failure
- Level Control Error Message in X6 E71
- Chassis function Message in X6 F16
BMW X6 Suspension Set-up
The BMW X6 is categorized as a sports activity coupé (SAC), and has been produced since 2008 in the E71 platform. The second generation, called the F16 platform was in 2016. The X6 shares its platform with the X5 in terms of suspension and chassis.
In the X6, the Front suspension set-up is a Double Wishbone set-up with a coilover Strut. There are 2 separate Lower Control Arms and therefore 2 Lower Ball-joints for wheel Spindle with a Torsion bar & coil springs.
The Rear suspension of the X6 is a 3-link independent suspension (lower control arm, Upper control arm and a Toe control arm) with Torsion bar & coil springs. The lower control arm was a 2-in-1 link with 2 bushing joints to the subframe and for this reason the trailing arm was eliminated.
In the F16 generation, self-leveling Rear air suspension was available in 2 optional packages in the sDrive 35i, xDrive 35i and the xDrive 50i models. The packages were:
- Adaptive M Suspension + rear axle air suspension
- Dynamic Damper Control + rear axle air suspension
In both the options, the standard coil spring would be replaced by an air strut and bottom mounting bracket to go with it as well as a different shock absorber that was tuned for air struts.
Front Lower control arm failure

- Knocking or Creaking noises while going over bumps coming from the front suspension
- Additionally there is Popping and Clunking noise coming from the front suspension when Steering the wheels in parking or slow speed
Troubleshooting Front Lower control arm bush failure
Knocking or Creaking in the front suspension could be either due to :
- Worn Out Thrust-Arm Bushings
- Worn Out Thrust-Arm Ball-Joint
- Worn out Top Strut Mount Bushing and Bearing
Worn out Thrust-Arm Bushings

- The Lower control arms, also called “Forward/Rearward Tension Struts”, are most prone to Bushing failure. On an average, these bushings would last the shortest among other suspension bushings
- The Lower Forward Control arm (Thrust Arm) handles the longitudinal forces coming onto the wheels when driving. The Thrust arms are designed such that the longitudinal wheel forces directly load the thrust arm bushings.
- These control arm bushings are ‘hydraulic + rubber’ type of isolators, because of their dual role of taking load as well as reducing noise and vibration.

- If you find a viscous brown fluid oozing out of the control arm, then it is confirmed that the Lower Control arm bushings have failed due to Rubber rupturing and leaking Hydraulic fluid.
- This failure results in a popping or clunking noise when the wheels are turned.
Worn out Thrust-Arm Ball Joint

- The lower control arm ball-joints are also subject to wear and tear.
- The deterioration is usually initiated as a crack or rupture in the rubber boot around the ball-joint
- This leads to loss of lubrication and finally to complete wear out
- The wear out causes play or movement accompanied by knocking noise. The play in the ball-joint is one of the reasons for the vehicle steering feeling value
- You can easily check for Ball-joint condition by this simple procedure:
- Get the car Lifted by the body
- Lock the steering wheel
- Hold the front tire with both your hands in a 6 o’clock position and try to swing the wheel up and down
- If you hear a ‘Knock’ or ‘Click’, then it is very much likely that the noise is due to a play in the Ball-joint
- For a vehicle that has crossed 70K miles, the best course of action would be to replace the whole Lower control arm since it comes with a new bushing and a new ball-joint all pre-assembled
Pro-Tips for Thrust Arms
- The Hydraulic Fluid Bushing generally fails beyond 40K-50K Miles, but it may be worthwhile to replace as soon as you notice suspension noise.
- While replacing the Thrust arm, it would be wise to look for a good aftermarket solution that would give more service life than the 50K miles or so offered by Rubber-Hydraulic bushes.
- You could either go for a ‘Solid’ Rubber bushing or a Mono-Ball type of Bearing instead of the Rubber-Hydraulic Bush
Worn out Top Strut Mount Bushing
- The suspension strut is attached to the body through the top Strut mount Bushing.
- These top strut mount bushing is designed to support part of the load of the front suspension and also provide isolation from road impacts.
- Once the bushing rubber has weathered and deteriorated, the strut becomes noisy and no longer provides isolation.

Pro-Tips:
- If a strut removal fixture isn’t available, then use a Lead-Screw Type of Spring Compressor that is a heavy-duty design. The important safety point is that the compressor spring jaws are sturdy enough and properly seat onto the spring. Use a Bench Vise to secure the strut for added safety.
- In low quality spring compressors, the spring hooks have a risk of slipping out of the spring leading to potential damage and injury since the spring is likely to burst out due its pre-load.

Front Shock Absorber Strut failure
- The car feels bouncier than usual at the front end
- Suspension squeaks knocks for minor road undulations
- Explained as seen on the BMW X6 F16 (2014-2018 model years)
Troubleshooting Front Shock Absorber Strut failure
- If you notice that the suspension has increased bounciness, it could be a case of shock absorber failure. The failed shock absorber can no longer dampen the suspension’s ‘Bounce’ motion.
- A suspension Strut that has a binding or frozen piston rod on the shock absorber tends to squeak for even minor movement
- The easiest thing to first do is to inspect the shock absorber body, and look for signs of oil that would indicate a seal failure.
- A failed shock absorber need not necessarily leak when it fails. If it has reached its end-of-life and worn out internally, it could also lose all its damping action and eventually seize.
Rear Shock Absorber Failure
Symptoms:
- Knocking and Popping Noises from the Rear going over bumps
- Rear end feels bouncier
- Applies to the F15 X5 as well as the BMW F16 X6
Troubleshooting Rear Shock Failure
- The Bouncy Ride symptom points to the Shock Absorber as a probable cause.
- The noises coming from the rear are partly due to the failed shock absorber allowing the bump stops to contact more often. And also the noises partly come from the worn out shock mounting bushes that allow the shock to move and hit against the mounting brackets.
- If your vehicle has crossed 40-50K miles, then it could be due for a shock replacement. Due to long-term internal wear, the shock starts losing its damping action over time.
- If the rear shock has started leaking oil due to a failed oil-seal, then it means that the shock will no longer be effective.
- One good way to tell if your shock has failed or not is to do a “Bounce Test”. Put all your weight on one of the front corners of the vehicle pushing it downwards. Keep oscillating the corner till you feel that it has reached its maximum height. Once you take your hands off the corner, observe how it settles. If it takes more than 2 oscillations to settle, that means the damper has failed.
- In the BMW X6, the Rear Shock Top mount can only be accessed from inside the vehicle behind the rear seats

Pro Tip
- While fitting a new shock absorber, always, Tighten the Top mounting bolts first and then the Lower mounting bolt.

- Also make sure that while tightening the Shock bottom bolt, the Wheel Hub is supported at its normal ride height. For this you can either use Blocks, a screwjack or a jack stand.
- If the shock bottom mounting bush is tightened at any other ride height, then when the car is lowered to normal ride height, the Bush will rest in a twisted condition and will have a reduced Bush service life.
‘Level Control’ Error Message in E70
- When turning ON the ignition the center console displays an error with the ‘Level Control’ system

- This error applies to the BMW X6 E70 generation
Root Causes:
- This error is mostly coming from the circuit concerned with sensing the ride height
- If the ride height reading turns out to be outside of the system preset limits, this error will show
- The reasons for this happening are many since the fault could be due to any component in the circuit
Troubleshooting ‘Level Control’ Error Message
- In a Diagnostic tool, Go to the module EHC (Electronic Ride height Control) and look for the error codes
- Look to see if the fault is detected at any particular corner as the source of error
- Visually inspect the particular corner sensor underneath the vehicle

- See whether the connections are corroded
- If the connections seem OK and still there seems to be an error, it might be the sensor itself that is defective
- In order to confirm this, replace the sensor then check if the error persists.
Chassis function Message in X6 F16
- Center console displays a ‘Chassis function Restricted’ Error
- Rear of the vehicle Sags
- Explained as seen on the X6 M Sport option vehicle of F16 generation
- Loss of ride height points to a loss in air pressure due either:
- A leakage somewhere within the system
- Compressor not able to generate pressure due to malfunction
Troubleshooting Chassis function Message in X6 F16: Leakage
- First and most vulnerable area of the suspension is always the Air Spring rubber bellows which are prone to wear and tear. Once the bellows wear out, they tend to crack and develop holes while developing into leakages.
- The next leakage point to be checked is the Valve block or Solenoid valves that distribute air pressure to the individual air bellows. The connector necks are potential leakage spots when the connector O-rings would have worn out.
- A leakage can be detected using a soapy water solution spray. Spray this solution at the area of interest and observe how the foam sticks to the surface. If there is an air leak, the foam sticks to that point and comes back even if you wipe the foam with your finger.
Troubleshooting Chassis function Message in X6 F16: Air Compressor
- The Error message points to the fact that the air suspension system does not have enough air pressure to be functional.
- The loss of pressure could also be due to a malfunctioning air compressor
- Air compressor malfunction happens due to a variety of reasons. The two major causes are:
- Internal wear of either the piston or cylinder does not allow the production of pressurized air since it has lost the ability to seal air on one side of the piston
- Blockage in the internal air dryer mechanism that restricts the flow of air
- In both of the above cases always use a Diagnostic tool to check what is the air pressure generated by the compressor
- In the EHC module, read the ‘Data Stream’ for Reservoir pressure. For a properly working compressor, the generated pressure should be at least 22 bar. Any reading below that means an internal issue with the compressor.
- Although the recommended repair procedure is to simply replace the compressor assembly, there is a possibility to rebuild your air compressor. See this Rebuild procedure for details.
- Once the compressor has been replaced, repeat the air pressure sensor
Other articles about BMW you may be interested in
BMW X5 Suspension Issues Explained
BMW X5 Air Suspension Issues Explained
BMW 5 Series Air Suspension Issues Explained
Conclusion
In this brief article we have discussed the different BMW X6 Suspension problems, what the causes are, and Troubleshooting Tips.
How do I Rebuild my BMW Air Suspension Compressor?
- This applies to all generations of BMW X5 and X6 F16 generation
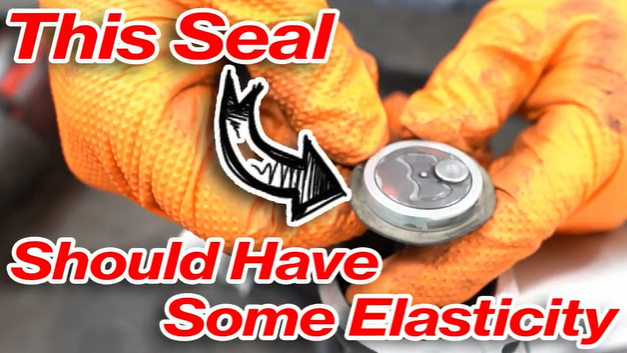
- To check for compressor issues, you need to dismantle it and check the Piston, Cylinder and Piston ring condition. Ideally, the piston rings must have elasticity

- The best course of action would be to replace the compressor, but for economic reasons, you could also try using a repair kit (Piston and rings) to rebuild the compressor.
The rebuild option does come with risks as there could be issues in the compressor other than just the piston and rings.

- The compressor has an Air Dryer integrated in the same assembly. This Dryer is filled with Desiccant Granules

- When the desiccant granules have reached their moisture retention capacity, they expand and leave no room for the air to freely pass through, leading to a partial blockage.
- When new, the granules should be Blue in color. They gradually become brown over time. If they turn completely brown, it means that the granules have fully saturated.
- The desiccant granules are replaceable and can be easily done